15 Day Beginner Course : Day 15
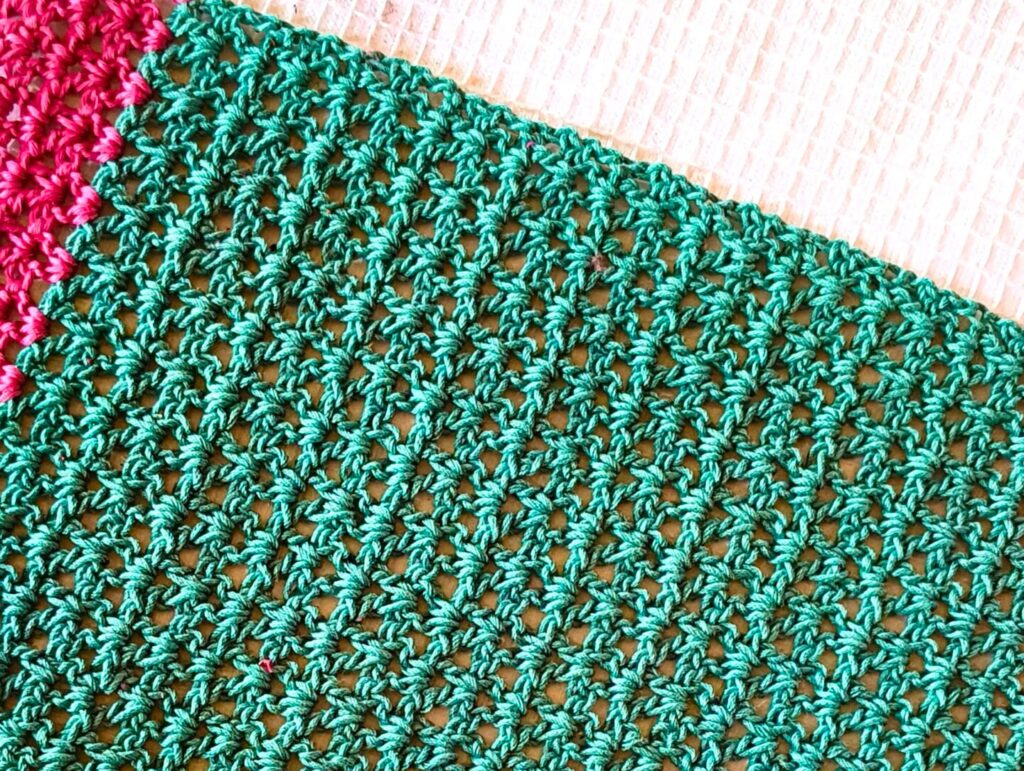
We are learning today the pattern of an easy V stitch crochet placemat for beginners. I hope you didn’t have any difficulty learning the V-stitch. If you have any questions, please ask me in our Facebook group or by commenting on this post. We will learn to make this placemat by practicing the V stitch.
This tutorial focuses on a V stitch crochet placemat for beginners, making it easy to follow even if you have just started learning crochet.
I’ve made a video of this pattern to help you all. I’ve included the link below. Be sure to check it out. Apart from this, if you want to print this pattern so that you do not have to look at the screen again and again, then that is also available, its link is given below.
Once you’ve mastered making it, make five more. This way, you’ll have a set that you can use or gift to someone.
It’s so easy. You’ll have fun making it.

Some glimpse of v stitch crochet placemat for beginners:
Here are some YouTube shorts that will help you understand how it looks.
Save this Post for easy access
Instead of searching for this post repeatedly, save it somewhere. I’ve listed some sharing and saving options at the beginning of this post.I will recommend Pinterest for this so that you can find my post quickly.

Copyright Notice:
This pattern is for personal use only. You may not reproduce, distribute, or sell this pattern in any form, including photocopies, digital copies, or translations.You are welcome to sell finished items made from this pattern in small quantities, but please credit crochethours as the designer. Mass production is not permitted.If you share your finished project online, please provide a link to the original pattern or mention Crochethours as the source.Thank you for respecting my work and supporting independent designers!
Abbreviations:
- ch: chain
- dc: double crochet
- tyw: turn you work
If you’ve forgotten a stitch, I’ve included links in the abbreviations. Please also check v stitch tutorial.
Materials:
- Yarn: 100% mercerised cotton dk yarn . I have taken 2 yarns here, both are 100% mercerized DK yarn. The first yarn is of teal color and the second is of magenta color. I am not mentioning any brand name here because I bought it from the local market which I liked very much.
- Hook: 3.5 mm
- scissors
- Needle for sewing
Pattern Notes
- Difficulty level: Beginner
- Terminology: US
- Size: 12 inches long, 8.5 inches wide.
- If you have trouble changing the color, you can skip changing the color.Instead, you can continue making the entire placemat with the same yarn.
- To turn every row we have to take turning chain 2.
Pattern:
It is easy to make v stitch crochet placemat for beginners. Let’s start.
- ch 45 (Teal color yarn)
- Row 1: make dc in the 4th chain from the hook
- ch1
- make another dc in the same stitch
- Skip ch2
Repeat point no. 2 to 5 till the end of the row.
👉You have 2 extra chains at the end of the row.
skip 1 chain, make a dc in the last chain
ch 2 , tyw
- Row 2 – 26: Make a dc in the chain space of the previous row. Ch1, make another dc in the same chain space
- repeat point no. 1 till the row end
Row 27: Make the entire row like row 2 but When making the last stitch, you should take a new yarn (majenta color) without completing your stitch with this yarn. I have explained this process in the video, you will understand it better in it.
Row 28 -31 : You have to make all these rows like the 2nd row.
Finished off, weave the ends. If you find trouble to weave in ends I have a video tutorial on it. Pls check.
Done
Points to keep in mind
- Do not make a V stitch in the gap between the two V stitches of the previous row, instead make it in the gap of the chain space.
- Be sure to make 1 dc in the chain stitch at the end of the row so that the edges of your placemat look clean.
Final Thought:
I hope you enjoy it. I had a lot of fun making this V stitch crochet placemat for beginners, and this stitch has become a favorite of mine.
Feel Free to Ask Me:
If you have any questions about this stitch or your crochet project, feel free to ask me.You can leave your question in the comments below or share it in our Facebook group.I regularly check comments and try to help as much as possible, especially beginners.No question is too small—ask anytime.
Share the Project You Created:
I would love to see what you made using this stitch.You can share your finished project on Instagram and tag me, or post it in our Facebook group. Seeing your work helps inspire other students and builds a supportive crochet community. Every project—big or small—is welcome.