
Hi friends, in today’s class we’ll learn how to finish your handmade projects. These are simple yet essential crochet finishing techniques.
In this, first of all we will learn that When we complete our circle, to finish it we join its ends with a slip stitch, but somewhere you must have seen that while joining with a slip stitch The end of our project is clearly visible. We’ll learn how to finish it.
Along with this, we will learn another technique that how to neatly change the color in the project, this is also a very important step. Because wrongly made changes can mess up your project.
Have you ever made a project where the color transitions didn’t work out well, making your project look messy? Let me know in our Facebook group.
And the third finishing technique we’ll learn is how to increase and decrease stitches. This is especially useful for round projects like amigurumi or a hat you’re making.
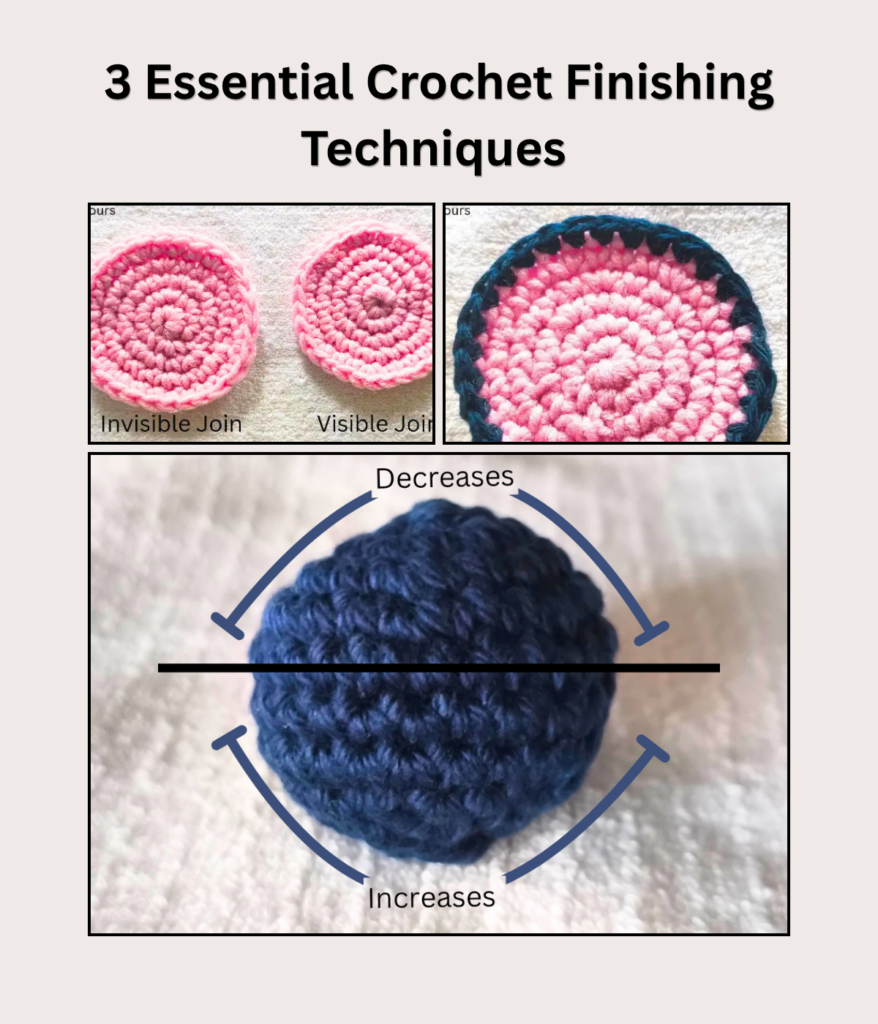
In short , we will master 3 techniques –
- The Invisible Join- This will hide the ends of your project in such a way that you won’t be able to see where the end of the project is.
- Clean Crochet Color Change- Changing the color of a project without messy knots.
- How to Increase and Decrease in Crochet.
After learning these techniques, your project will become better.
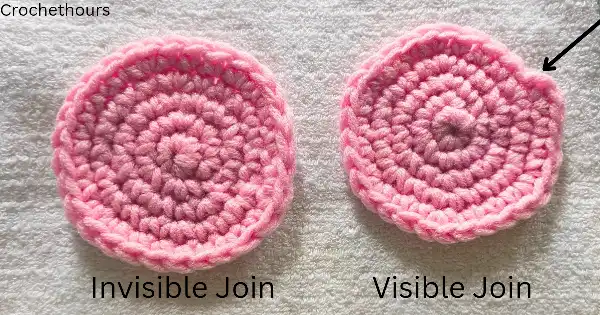
1.The Invisible Join (Seamless Round Finish)
Crochet Finishing Techniques 1
Yes, it is also called invisible join, as is clear from the name, we will learn to do invisible join in it.
Step-by-Step Instructions:
- Cut the yarn: When you complete your round project i.e. last stitch is completed then stop it without joining it with slip stitch or making a chain stitch. Cut the yarn, leaving a tail of about 4 to 6 inches.
- Pull the loop: Pull your crochet hook upwards so that the end of the yarn comes completely out of the loop (do not make a chain 1 here).
- Thread the needle: Thread the cut yarn onto a needle.
- Insert under the loop: Now insert the yarn into both loops of the first stitch of your round project, bringing it from back to front. And pull the needle.
- Insert the needle in the last stitch: Now insert the needle into the back loop of your last stitch and pull it through, moving from front to back.
- Adjust the tension: Now adjust its tension a little so that it looks like all the other stitches. You will see that you have created a fake stitch (v shape) here.
- weave the ends: You weave this yarn tail towards the back.
A traditional slip stitch creates a visible diagonal line that spoils the overall design. Using this seamless crochet join ensures your project looks flawless from both the front and the back.
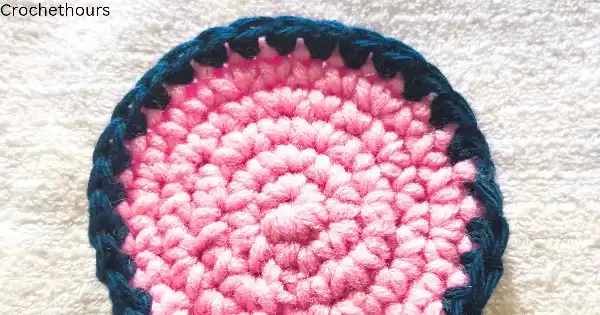
2.Clean Crochet Color Changes (No Messy Knots)
Crochet Finishing Techniques 2
To change the color clearly in the project, we do not have to change the color by slip stitch or by joining both the yarns but we have to complete our stitch with a yarn of a new color. Let’s do it like this-
step 1- First of all, reach that stitch of your project from where you want to change the color.
step 2- Open this last stitch
step 3 – Make the stitch again but do not complete it, meaning if you are making a single crochet stitch then turn the yarn over and pull the stitch and stop there.
step 4- Now we’ll add new yarn. To do this, make a loop of the new yarn in your hands and use your hook to pull this yarn through both loops of the single crochet.
step 5- Adjust its tension. Hold both the yarns carefully and make the next stitch with the new yarn.
That’s it, it was very simple but it will give your project a clean look.
Now let us move towards the 3rd technique which is increase and decrease
3.How to Increase and Decrease in Crochet
Crochet Finishing Techniques 3
This finishing technique is also very simple but very effective.
First of all we will learn how to increase stitches.
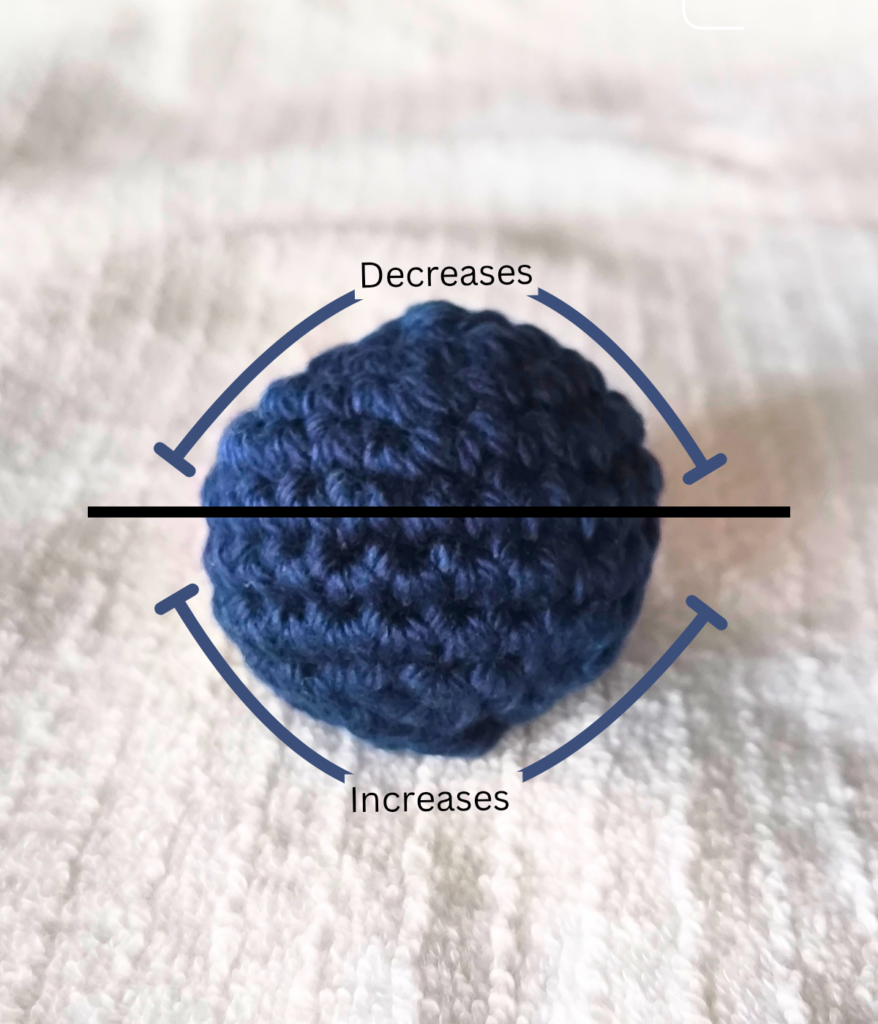
First of all let me tell you why we are learning this or what is its use, as the name suggests, in this we increase the stitches so that the projects can take a round shape. Additionally, this finishing technique is useful not only for round projects but also for making crochet wearables.
Let’s get started. If you have any doubts, please ask me in the comments.
Instructions –
step 1 – First make a normal stitch, this works for all types of stitches but for practice make 1 single crochet stitch in your project.
step 2 – Please note that we are now going to increase the stitch. To do this, you will need to make one more single crochet stitch in the same stitch.
Done! This was also very easy. I think you learned it in just one try. Please let me know in the Facebook group.
Decrease Stitch
Decrease stitch reduces your stitch count and gives your project a shape, similar to how you might have seen a doll’s face in amigurumi, which is perfectly round.
To make this round shape, it is increased from the bottom and decreased from the top so that it becomes completely round.
Instructions –
step 1 – yarn over pull up the loop.
step 2 – yarn over again and pull up a loop from next stitch.
step 3- now you have 3 loops on your hook.
step 4 – yarn over again , pull up a loop and Pull it out through these three loops.
Done!! This was also easy, wasn’t it!!!
Invisible Decrease –
You might be wondering what is the need for invisible decrease after the decrease. Have you ever noticed that the fillings in an amigurumi project are showing through or that there are small holes in it?
To prevent this from happening, invisible decrease is often used in amigurumi.
Instructions –
step 1- Insert your hook into the front loop of the stitch and pull the yarn through as you yarn over.Do not complete this stitch.
step 2- Repeat the 1st step in the next stitch.
step 3 – You will now have 3 loops on your hook. Yarn over and pull the yarn out of these three loops.
Done!!! This technique is similar to decrease, except that instead of taking both loops of the stitch, we work only in the front loop.
These finishing techniques are easy and can make your project look great.
We’ll practice these finishing techniques on our real projects. Subscribe for new and easy projects.
Please send me your projects in the Facebook group.
Save this post on Pinterest so that you can come back to it again and again and practice.
Happy Crocheting☺️